A floor nailer is a tool used for attaching flooring boards to a subfloor or underlayment. It uses compressed air or a manual strike to drive nails into the tongue of the board, securing it to the surface below. Floor nailers are popular among DIY enthusiasts and professionals alike because they can speed up the installation process and ensure a secure attachment. They can also reduce the risk of splitting the flooring board, which can occur with other types of fasteners like screws or nails. Overall, a floor nailer is a valuable tool for anyone who wants to install new flooring in their home or business.
Different Types of Floor Nailers
There are several types of floor nailers available, including:
1. Pneumatic Floor Nailers
These nailers are powered by compressed air and are the most popular type among professionals. They are fast and efficient, allowing for quick installation of large flooring areas.
Pros
- Faster and more efficient than manual nailers.
- Can be used for larger flooring areas and tougher materials.
- Less physical effort is required, which can reduce fatigue during use.
Cons
- More expensive than manual nailers.
- Requires an air compressor and hoses, which can be an additional expense.
- May require more maintenance than manual nailers.
2. Manual Floor Nailers
These nailers are driven by a mallet or hammer and are operated by hand. They are a good choice for smaller jobs or for those who do not want to invest in a pneumatic nailer.
Pros
- Less expensive than pneumatic nailers.
- Simple and easy to use.
- Ideal for smaller projects or for those who don’t want to invest in an air compressor.
Cons
- Requires more physical effort than pneumatic nailers, which can lead to fatigue during use.
- Slower and less efficient than pneumatic nailers.
- May not be suitable for tougher materials or larger flooring areas.
3. Cleat Nailers
These nailers use cleats instead of nails to attach the flooring boards. They are a good choice for engineered hardwood floors.
Pros
- Provide a strong, secure attachment for engineered hardwood floors.
- Can be used for both tongue-and-groove and solid wood flooring.
Cons
- More expensive than some other types of nailers.
- Require cleats, which can add to the cost.
- May not be suitable for other types of flooring materials.
4. Staple Nailers
These nailers use staples instead of nails to attach the flooring boards. They are a good choice for thinner flooring materials such as engineered hardwood or bamboo.
Pros
- Provide a strong attachment for thinner flooring materials.
- Are less likely to split the wood compared to other types of nailers.
- Can be used for both tongue-and-groove and solid wood flooring.
Cons
- May not be as strong as cleat or nail attachment methods.
- Staples can be difficult to remove if a mistake is made during installation.
- May not be suitable for thicker or tougher flooring materials.
Prepare The Floor For Nailing
Before using a floor nailer, it’s important to properly prepare the floor to ensure the best results. Here are some steps to follow:
- Clear the work area: Remove any furniture, appliances, or other items from the room so that you have a clear work area. This will make it easier to move around and use the floor nailer safely.
- Clean the floor: Sweep or vacuum the floor to remove any debris, dust, or dirt. This will help ensure a clean surface for the flooring boards to attach to.
- Mark the layout: Use a chalk line or other marking tool to create a layout for the flooring boards. This will help ensure that the boards are installed straight and evenly spaced. Make sure to account for any obstacles or irregularities in the floor, such as pipes or corners.
- Acclimate the flooring: If your flooring material needs to acclimate to the room’s temperature and humidity, follow the manufacturer’s instructions and allow it to acclimate for the recommended amount of time.
- Check the subfloor: Inspect the subfloor to ensure that it’s in good condition and free from any damage or unevenness. If necessary, repair or replace any damaged sections before beginning installation.
set up the floor nailer and adjust it for optimal performance
Setting up the floor nailer and adjusting it for optimal performance is essential for achieving the best results. Here’s how to do it:
- Install the correct nails: Choose the correct size and type of nails for your flooring material and floor nailer. Follow the manufacturer’s instructions for loading the nails into the nailer.
- Adjust the air pressure: If using a pneumatic floor nailer, adjust the air pressure according to the manufacturer’s instructions. The pressure should be high enough to drive the nails into the flooring material, but not so high that it damages the material or causes the nailer to recoil.
- Set the depth: Adjust the depth of the nailer so that the nails are driven flush or slightly below the surface of the flooring material. This will help prevent any tripping hazards or damage to the flooring boards.
- Test the nailer: Before beginning installation, test the nailer on a scrap piece of flooring material to ensure that it’s driving the nails to the correct depth and that the pressure is adjusted properly.
- Position the nailer: Position the nailer at the beginning of the first row of flooring boards, making sure it’s perpendicular to the boards. Hold the nailer at a slight angle to the board and press the trigger to drive the first nail.
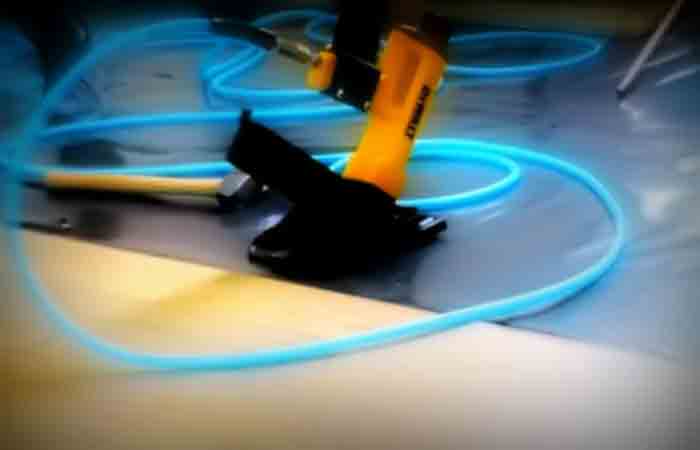
Using the Floor Nailer
Using a floor nailer can be an efficient and effective way to install flooring. However, it’s important to use the nailer properly to achieve the best results. Here are some detailed steps to follow:
- Position the flooring board: Start by positioning the first flooring board in place. Align the board with the layout marks you made earlier.
- Position the nailer: Position the nailer at a slight angle to the board, with the nailer’s nose facing the tongue of the board. Make sure the nailer is perpendicular to the board.
- Apply pressure: Apply downward pressure to the nailer to engage the safety mechanism. This will prevent the nailer from firing until it’s in contact with the board.
- Fire the nailer: Pull the trigger to fire the nailer and drive the nail through the tongue of the board and into the subfloor below. Be sure to use the correct size and type of nail for your flooring material.
- Repeat: Continue installing flooring boards in this manner, making sure to leave a small gap between each board to allow for expansion and contraction.
Here Are Some Additional Tips For Using A Floor Nailer
- Use a tapping block and mallet to help seat the boards tightly together before nailing them down. This will help prevent any gaps or unevenness between boards.
- If you’re having trouble driving nails, adjust the air pressure or depth setting on the nailer. Consult the manufacturer’s instructions for guidance.
- Be mindful of the nailer’s position to avoid hitting the tongue or the face of the board with the nail. This can cause damage to the board or prevent it from fitting properly with the adjoining boards.
- Periodically check the nailer for any jams or issues, and clear any debris or nails that may be causing problems. This will help ensure that the nailer is working properly and prevent any damage to the flooring material.
Troubleshoot Common Issues
Even with the proper use of a floor nailer, issues can arise during installation. Here are some common issues and how to troubleshoot them:
- Nails not firing or jamming: If the nailer is not firing nails or the nails are jamming, check for any debris or nails that may be obstructing the nail channel. Clear any obstructions and try again. If the issue persists, check the air pressure and depth settings to make sure they are correct for your flooring material.
- Nails not driven to the correct depth: If the nails are not driven to the correct depth, adjust the depth setting on the nailer. Make sure to test the nailer on a scrap piece of flooring material to ensure that the depth is adjusted properly.
- Nails are splitting the flooring boards: If the nails are splitting the flooring boards, make sure to use the correct size and type of nail for your flooring material. If necessary, adjust the air pressure or depth setting on the nailer to reduce the force of the nail.
- Uneven or warped boards: If the flooring boards are uneven or warped, check the subfloor for any damage or unevenness. Make any necessary repairs before continuing installation. Use a tapping block and mallet to help seat the boards tightly together before nailing them down.
- Nailer is recoiling or bouncing: If the nailer is recoiling or bouncing during use, check the air pressure to make sure it’s not too high. Adjust the pressure if necessary, and try again.
Safety Tips
Using a floor nailer can be a safe and effective way to install flooring, but it’s important to follow proper safety precautions to prevent injury. Here are some safety tips to keep in mind:
- Wear appropriate personal protective equipment: Always wear eye and ear protection when using a floor nailer. Additionally, wearing gloves and a dust mask can help protect your hands and lungs from debris.
- Keep the work area clean and clear: Clear the work area of any debris, tools, or other objects that could cause tripping hazards. Make sure the area is well-lit and that you have plenty of space to move around safely.
- Use the nailer properly: Follow the manufacturer’s instructions for proper use of the nailer. Do not modify the tool or use it for any purpose other than its intended use.
- Position the nailer carefully: Be mindful of the nailer’s position to avoid hitting the tongue or the face of the board with the nail. This can cause damage to the board or prevent it from fitting properly with the adjoining boards.
- Work in a safe and organized manner: Plan your work area and make sure to work in a safe and organized manner. Do not rush the installation process, as this can lead to mistakes and injuries.
- Keep bystanders clear of the work area: Make sure that bystanders, children, and pets are kept clear of the work area. Only allow trained and authorized personnel to use the nailer.
- Properly maintain and store the nailer: Regularly inspect the nailer for any damage or wear and tear. Clean and lubricate the tool as needed, and store it in a safe and secure location when not in use.
Final Words
Using a floor nailer can be a great way to install flooring efficiently and effectively. However, it’s important to follow proper procedures and safety precautions to achieve the best results and prevent injury. By understanding the different types of floor nailers, preparing the floor properly, setting up and adjusting the nailer for optimal performance, troubleshooting common issues, and prioritizing safety, anyone can successfully use a floor nailer for their DIY home projects. With this comprehensive guide, readers can confidently tackle their flooring installation projects and achieve professional-looking results.


