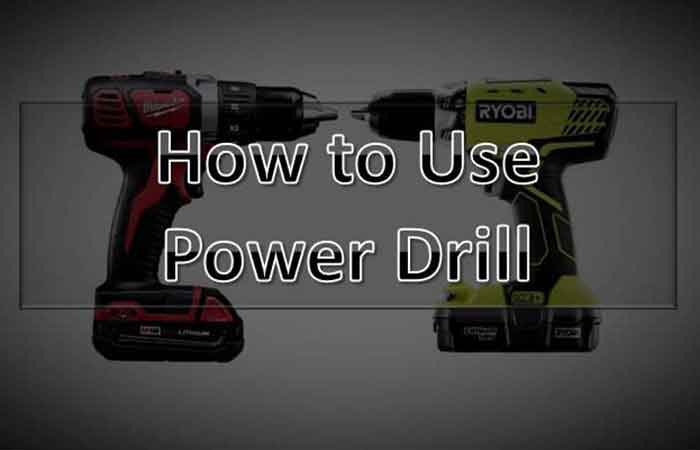
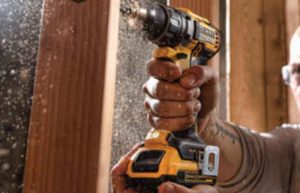
A power drill is a versatile tool that can be used for a variety of tasks. It can be used for woodworking, metalworking, masonry, and even for hanging shelves and pictures. With the right attachment, a power drill can be used to sand, buff, and polish surfaces.
Basic anatomy of a power drill and the different parts that make it up
A power drill consists of several parts that work together to make the tool function. Here are some of the key components of a power drill:
Chuck
The chuck is the part of the drill that holds the drill bit in place. It’s usually located at the front of the drill and can be tightened or loosened to insert or remove a drill bit.
Motor
The motor is the main component of the drill that powers the rotation of the chuck and the attached drill bit. It’s usually located towards the back of the drill and is powered by electricity or a battery.
Trigger
The trigger is the part of the drill that is used to control the speed of the motor. When the trigger is squeezed, the motor will spin the chuck and the drill bit faster. When the trigger is released, the motor will slow down and eventually stop.
Battery (if applicable)
Some power drills are cordless and are powered by a rechargeable battery. The battery is usually located towards the bottom of the drill and can be removed and replaced as needed.
Gear selector
The gear selector is a switch that can be used to adjust the speed and torque of the drill. By selecting a different gear, the user can adjust the drill’s speed to match the task at hand.
Clutch
The clutch is a mechanism that controls the torque of the drill. It allows the user to adjust the amount of force that the drill applies to the workpiece, which can be helpful for avoiding damage to the material or the drill bit.
different types of drills and their features Table
comparison table of the features of corded and cordless tools:
| Feature | Corded Tool | Cordless Tool |
|---|---|---|
| Power Source | Plugged into an electrical outlet | Powered by rechargeable batteries |
| Mobility | Limited by the length of the cord | Portable and can be used anywhere |
| Power | Generally more powerful and consistent | May have less power and may experience power fade as the battery drains |
| Runtime | Unlimited runtime as long as the tool is plugged in | Limited runtime based on the capacity of the battery |
| Weight | Typically heavier due to the motor and cord | Generally lighter, but may feel heavier with a larger battery |
| Maintenance | Less maintenance required since it doesn’t have a battery that needs to be charged or replaced | Requires periodic battery replacement and charging |
| Cost | Generally less expensive than cordless tools | Can be more expensive than corded tools due to the cost of batteries and chargers |
| Applications | Used in heavy-duty applications where power is required and mobility is less of a concern | Used in applications where mobility is important, such as construction sites or outdoor projects |
| Environmental Impact | May consume more energy and produce more greenhouse gas emissions | Can be more environmentally friendly if the batteries are rechargeable and made from recyclable materials |
comparison table of the features of an impact tool and a rotary tool:
| Feature | Impact Tool | Rotary Tool |
|---|---|---|
| Function | Used for driving fasteners and bolts | Used for cutting, grinding, sanding, and polishing |
| Power Source | Electric or battery-powered | Electric or battery-powered |
| Type of Force | Concussive blows | Rotational force |
| Tool Head | Hexagonal head for attaching bits | Various types of bits and attachments, including cutting wheels, grinding stones, and sanding discs |
| Types | Corded impact driver, cordless impact driver, impact wrench, etc. | Corded rotary tool, cordless rotary tool, die grinder, etc. |
| Torque | High torque output for heavy-duty applications | Low to medium torque output for precision work |
| Speed | Generally lower speeds compared to a rotary tool | Higher speeds and variable speed options |
| Applications | Used in automotive and industrial applications, construction, and DIY projects | Used in woodworking, metalworking, and crafting |
| Skill Level | Requires some skill and experience to use effectively | Can be used by beginners with basic training |
| Safety Concerns | Can cause injury if used improperly or without proper protective gear | Can also cause injury if not used properly, but generally considered safer than an impact tool |
Comparison Table of The Features of A Hammer And A Driver:
| Feature | Hammer | Driver |
|---|---|---|
| Function | Used for driving nails into wood or other materials | Used for tightening and loosening screws or bolts |
| Power Source | Manual (requires physical force from user) | Electric or battery-powered |
| Type of Force | Blunt force | Rotational force |
| Tool Head | Flat head with claw for removing nails | Hexagonal head for attaching screwdriver bits |
| Types | Claw hammer, sledgehammer, ball-peen hammer, etc. | Corded driver, cordless driver, impact driver, etc. |
| Weight | Varies depending on the type of hammer, but typically heavier than a driver | Lighter than a hammer, but still varies depending on the type of driver |
| Applications | Used in woodworking, construction, and DIY projects | Used in automotive repairs, furniture assembly, and other general repairs |
| Skill Level | Can be used by beginners with basic training | Requires some skill and experience to use effectively |
| Safety Concerns | Can cause injury if used improperly or without proper protective gear | Can also cause injury if not used properly, but generally considered safer than a hammer |
How To Choose The Right Drill For Your Needs And Budget
When it comes to selecting the right drill for your needs and budget, there are a few key factors to consider. By understanding your project requirements and budget, you can find a drill that meets your needs without breaking the bank. Here are some things to keep in mind when choosing a drill:
Type of Drill
There are a few different types of drills available, each with their own advantages and disadvantages. Here are a few common types:
- Corded Drill: This type of drill is plugged into an electrical outlet and provides consistent power without needing to recharge batteries. These drills are often more powerful than cordless drills, but are less portable and have limited mobility due to the cord.
- Cordless Drill: Cordless drills are powered by rechargeable batteries, which makes them more portable and versatile. They come in various sizes and power ranges, and can be used for a wide range of applications.
- Hammer Drill: Hammer drills are designed for drilling through hard surfaces like concrete or brick. They use a hammering motion in addition to rotational force to help break through tough materials.
- Impact Driver: Impact drivers are designed for driving screws and bolts, and use a combination of rotational force and concussive blows to apply torque.
- Right-Angle Drill: This type of drill is designed for use in tight spaces, and features a right-angled chuck that allows you to drill at 90-degree angles.
Power and Torque
The power and torque of a drill are important factors to consider when selecting a drill for your needs. Higher-powered drills are generally better for heavy-duty applications, while lower-powered drills are better for light to medium-duty tasks.
Chuck Size
The chuck is the part of the drill that holds the drill bit. Chuck sizes typically range from ¼ inch to ½ inch, with larger sizes being better for heavier applications.
Battery Life
If you are considering a cordless drill, it’s important to pay attention to the battery life. Look for a drill with a battery that can provide enough power to get your job done without needing to recharge too frequently.
Ergonomics
Consider the weight and grip of the drill, as well as its balance and ease of use. A drill that is comfortable to hold and easy to maneuver will make your job easier and more efficient.
Price
Finally, consider your budget when selecting a drill. While higher-end drills may offer more power and features, they may not always be necessary for your project. Consider your needs and select a drill that meets those needs without going over budget.
By keeping these factors in mind, you can select a drill that meets your needs and budget. Whether you are a DIY enthusiast or a professional contractor, there is a drill out there that will get the job done.
How To Use a Power Drill Step-by-Step Guide
here’s a detailed, illustrated guide on how to use a power drill:
Step 1: Gather Materials and Tools Before using a power drill, you’ll need to gather the following materials and tools:
- Power drill
- Drill bits in various sizes (depending on the project and the material you’ll be drilling)
- Work gloves
- Safety goggles or glasses
- Pencil or marker (for marking the spot where you’ll be drilling)
- Clamps (optional, for securing the workpiece)
Step 2: Attach the Drill Bit
- Locate the chuck at the front of the drill.
- Loosen the chuck by turning it counterclockwise.
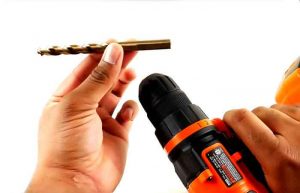
- Insert the drill bit into the chuck, making sure it is centered and straight.
- Tighten the chuck by turning it clockwise, using your hands or a chuck key if provided.
Step 3: Adjust the Speed and Torque
- Set the drill’s gear selector to the appropriate speed and torque setting for the project and material you’ll be drilling.
- Use the trigger to adjust the speed of the drill. Start with a slow speed and gradually increase it as needed.
Step 4: Mark the Spot
- Use a pencil or marker to mark the spot where you’ll be drilling. This will help ensure that the hole is in the right location and is straight.
Step 5: Secure the Workpiece (Optional)
- If the workpiece is small or unstable, use clamps to secure it to a workbench or other stable surface. This will help prevent it from moving or spinning during drilling.
Step 6: Begin Drilling
- Place the tip of the drill bit on the marked spot.
- Hold the drill with both hands, with one hand on the trigger and the other hand on the handle.
- Apply light pressure and begin drilling. Keep the drill straight and level, and avoid tilting or angling it.
- Depending on the material you’re drilling, you may need to periodically remove the drill bit to clear away debris and prevent overheating.
Step 7: Finish the Hole
- Once the drill bit has gone through the material, slowly release the trigger and allow the drill to come to a stop.
- Gently remove the drill bit from the hole.
- Use a brush or cloth to clean any debris or dust from the hole.
Step 8: Repeat as Needed
- Repeat the drilling process as needed, making sure to adjust the speed and torque settings and use the appropriate drill bit for each hole.
Some tips on how to adjust the speed and torque of a drill
- Read the user manual: Before using a drill, it’s important to read the user manual to understand the different speed and torque settings available and how to adjust them.
- Match the speed and torque to the material: Different materials require different speeds and torques to be drilled effectively. For example, drilling through wood may require a lower speed and torque setting, while drilling through metal may require a higher setting.
- Start slow and gradually increase the speed: When starting to drill, begin with a slow speed and gradually increase it until you reach the desired speed for the material you’re working with. This will help prevent the drill bit from slipping or overheating.
- Use the clutch: Most drills come with a clutch that allows you to adjust the torque. This is particularly useful for tasks such as driving screws, where you want to avoid over-tightening or stripping the screw.
- Avoid overheating: Overheating can damage the drill bit and the material being drilled. To avoid overheating, periodically stop drilling and allow the bit to cool down, particularly when drilling through tough materials.
How to change the drill bit and battery step-by-step instructions
How to change the drill bit:
- Ensure that the drill is turned off and unplugged or the battery is removed.
- Loosen the chuck by turning it counterclockwise.
- Remove the old drill bit by pulling it out of the chuck.
- Insert the new drill bit into the chuck, making sure it is centered and straight.
- Tighten the chuck by turning it clockwise, using your hands or a chuck key if provided.
How to change the battery:
- Ensure that the drill is turned off and unplugged or the battery is removed.
- Locate the battery compartment on the drill.
- Press the release button or lever to remove the old battery.
- Insert the new battery into the compartment, making sure it clicks into place.
- Confirm that the battery is securely in place and that the drill is working properly before resuming use.
We hope these tips and instructions have been helpful in using a power drill effectively and safely. Remember to always read the user manual and practice safety precautions.
How To Maintain And Clean Your Power Drill To Ensure Its Longevity
Maintaining and cleaning your power drill is essential to ensure its longevity and proper functioning. Here are some tips on how to maintain and clean your power drill:
- Keep it clean: After every use, wipe down the drill with a clean, dry cloth to remove any debris or dust. This will help prevent buildup and extend the life of the tool.
- Lubricate moving parts: Apply a small amount of lubricant to the moving parts of the drill, such as the chuck and gears, to keep them working smoothly. Follow the manufacturer’s recommendations for the type of lubricant to use.
- Check the power cord: Check the power cord for any damage or wear, such as cuts, tears, or frayed wires. If you notice any damage, stop using the drill and have it repaired before resuming use.
- Store it properly: Store the drill in a dry, clean, and secure place, such as a toolbox or storage case. This will help prevent damage and protect the tool from dust and debris.
- Check the battery: If your drill is cordless, check the battery regularly for any signs of wear or damage, such as cracks or leaks. Replace the battery if necessary, and always follow the manufacturer’s recommendations for charging and storage.
- Have it serviced: If you notice any issues with the drill, such as strange noises or overheating, have it serviced by a professional. Regular maintenance and repair can help prevent larger issues and extend the life of the tool.
By following these tips for maintaining and cleaning your power drill, you can help ensure its longevity and proper functioning. Regular upkeep can also help prevent accidents and improve safety while using the tool.
Final Words
In conclusion, a power drill is a versatile and essential tool for DIY projects and professional tasks. With the right knowledge and precautions, anyone can learn how to use a power drill effectively and safely.
Before using a power drill, it’s important to read the user manual and familiarize yourself with the different parts and features of the tool. Always wear safety gear such as gloves and safety goggles or glasses, and take precautions to avoid accidents such as loose clothing or jewelry.
When using a power drill, be sure to adjust the speed and torque settings to match the material you’re working with, and use the appropriate drill bit for the job. Always start slow and gradually increase the speed, and use the clutch to avoid over-tightening or stripping screws.
Maintaining and cleaning your power drill is essential for its longevity and proper functioning. Regular upkeep such as wiping down the tool, lubricating moving parts, and checking the power cord and battery can help prevent damage and improve safety.
By following these tips and precautions, anyone can become proficient in using a power drill for a variety of tasks, from woodworking to hanging shelves. With its speed, efficiency, and versatility, a power drill is a valuable tool in any DIY or professional toolbox.
Frequently Asked Questions
What is a power drill used for?
A power drill is used for drilling holes in a variety of materials, such as wood, metal, and plastic. It can also be used for driving screws, sanding, and polishing.
Is a power drill necessary for DIY projects?
While a power drill is not absolutely necessary for all DIY projects, it can make tasks much easier and more efficient, especially when working with tougher materials or larger projects.
How do I know which type of drill bit to use?
The type of drill bit to use depends on the material you’re drilling into. For example, a twist bit is suitable for drilling through wood, while a masonry bit is needed for concrete and brick.
Can I use a power drill on concrete?
Yes, but you’ll need a hammer drill or rotary hammer with a masonry bit to drill through concrete effectively.
Can a power drill be dangerous?
Yes, power drills can be dangerous if not used properly. Always wear appropriate PPE, follow safety precautions, and read the user manual before using the tool.
What PPE do I need to wear when using a power drill?
You should wear work gloves and safety goggles or glasses to protect your hands and eyes from debris.
How can I prevent the drill from overheating?
To prevent the drill from overheating, use a slow and steady speed, and take breaks periodically to allow the bit to cool down.
How do I drill into different materials?
To drill into different materials, adjust the speed and torque settings of the drill and use the appropriate drill bit for the material.
Can I use a power drill to screw or unscrew bolts?
Yes, you can use a power drill with a screwdriver bit to drive or remove screws and bolts.
Can I use a power drill to build furniture?
Yes, a power drill can be useful for building furniture, particularly when assembling components or attaching hardware.
What other power tools should I consider purchasing for DIY projects?
Other useful power tools for DIY projects include a circular saw, jigsaw, sander, and router. The specific tools you need will depend on the project and your skill level.
